Purple Phoenix Games (2266 KP) rated Century: Golem Edition - An Endless World in Tabletop Games
May 5, 2021
Disclaimer: This game comes with rules to incorporate any/all of the Century Golem games into one bigger game. In this review, I will only be discussing the stand-alone final game in the Century Golem trilogy. -L
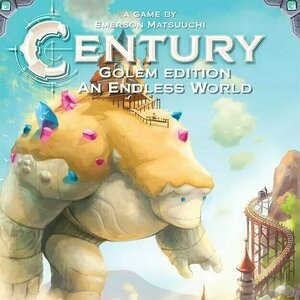
Century: Golem Edition – An Endless World (referred to as just An Endless World for this review) is a game of set collection and worker placement in which players are trying to earn the most points by the end of the game. To setup the game, follow the instructions outlined in the rules, dependent upon your player count. Each player begins the game with 6 Trader meeples (or 7 in a 2-player game) in their supply, and a specified number/type of crystals. The game is now ready to begin!
On your turn, you will have 2 options: Work or Rest. To Work, you will first select a location square on the board. You may not choose a location where you already have Traders, or that has an Exploration tile. You will then place Traders from your supply onto the chosen location – the number of Traders required is printed on the location. If the location is unoccupied, simply place the required number of Traders. If the location is occupied by an opponent, you may place Traders there, but you must match the opponents Traders, plus an additional Trader, to take control of the location. Any opposing Traders ousted in this manner are returned to their players’ supply. Once you have placed Traders on a location, you can then perform the action listed on that location. Action options are: producing gems, upgrading gems, trading gems, or collecting Point cards/bonus tokens. If you cannot or do not want to use a location on your turn, you can Rest. To Rest, you will collect all of your Traders from the board and place them back into your supply.
Point cards can provide immediate, ongoing, or end-game benefits for players. Help cards allow you to place 1 fewer Trader than required on certain locations. Tool cards give players an additional gem of a specified color when they place Traders on corresponding locations. New Trader cards allow players to add either 1 or 2 more Traders to their supply, thus increasing their ability to play each ’round’ before needing to Rest. Finally, Exploration cards allow the player to select an Exploration token from the board. Any time an Exploration token is claimed, that location is now ‘uncovered’ and can be used for the remainder of the game. Bonus tokens grant end-game points based upon sets of icons collected, number of Traders in your supply, or simply straight-up points.
The game continues in this fashion, alternating turns, until a player has collected their 8th Point card. The current round is played out, and then points are counted. Points are earned through Point cards, bonus tiles, Exploration tiles, and any remaining gems in your supply. The player with the highest score wins!
One thing I really like about worker placement games is that the actual gameplay is pretty logical and straight-forward. Place your worker, perform action. And An Endless World is no exception to that. Of course, how you decide to play all comes down to your strategy, and again, An Endless World has tons of options for players. Maybe you want to just get 8 Point cards as quickly as possible and call it a day. Or perhaps you want to maximize your bonus tokens and eke out as many points from those as possible. Or maybe you even just want to keep your opponent(s) from achieving their goals. You can play this game so many different ways, and you can totally adapt and change strategy mid-game if you so choose. Each game feels unique and new, and I have yet to tire from this gameplay.
An Endless World is a worker placement game, but there is one factor that I find extremely unique for the mechanic. Usually, in worker placement games, once a worker has occupied a location, it remains there until the player chooses to recover their workers. An Endless World offers players the chance to oust opponents from locations, by placing the same number plus 1 additional worker. I just think this is super neat, because it means that you can’t just ‘block’ a location from everyone. If someone really wants that location, and they have the workers, they can get to that location. Also, along those lines, since ousting a player from a location means you have to match their workers plus an additional worker, you have to decide if you want to risk dedicating that many workers to a single location. You might reaaaaally want to perform that action, but for the cost of 4 Traders, is it worth it at this moment? Could those workers better be used on different locations and you just snatch your desired location on a future turn? All part of your strategy for the game, and definitely keeps all players engaged.
Let me touch on components for a minute. As with the other Century Golem games, An Endless World is extremely well-produced. The gems are the same quality, the cards are nice, thick, and clear to read, and the cardboard tokens are nice and sturdy. Plan B Games has hit the mark on this trilogy of games, and they truly are a pleasure to play. Obviously, the artwork and theme consistency throughout the Century Golem trilogy has been really satisfying, but that also carries over into the gameplay. All 3 games use much of the same iconography, so honestly learning An Endless World was super fast and easy for me. That uniformity is extremely user-friendly and is a huge plus for me.
So I guess you can see from my score and from reading this review that I am a huge fan of An Endless World. The final game of this trilogy is a home run for me, and I just keep thinking about what strategy I want to try in my next game. That in and of itself is an indication of a great game – thinking about it even when you’re not playing it! I have yet to try the variants that include the other 2 Century Golem games, and I am very much looking forward to integrating them all into one giant and (hopefully) awesome Century Golem saga. Purple Phoenix Games gives this one an expansive 16 / 18. Give it a shot, even if you haven’t played the other Century Golem games!


Purple Phoenix Games (2266 KP) rated Dicetopia in Tabletop Games
Jun 12, 2019

Welcome to the Dicetopia – a vast city teeming with opportunity. Some people capitalize on those opportunities for the greater good, but not you. You and your faction have more dubious motivations – you see a city ripe for the taking. Unfortunately for you, other factions in the city see the same thing. Now, you must work quickly and quietly to gain control over the city’s neighborhoods before your opponents! Pick up loot, carry out secret missions, and undermine your opponent in any way possible. The sneakiest and most clever faction will come out on top – will it be yours?
In Dicetopia, you are a member of a faction vying for control of the city. You and your opponents have secret missions to complete, and your strategy will vary depending on those missions. On your turn, you will swap one of the agents from your faction board with a die from any neighborhood. Each neighborhood has an action associated with it, and placing an agent there allows you to take the designated action. Neighborhood actions could be beneficial for you (re-rolling a die on your faction board), or they could be detrimental for your opponent (swapping one of their dice for one from the board). A controlling presence is one key to success, so make sure you have more agents than your opponent in any neighborhood! End-game scoring is in three parts: 1. Die total from your faction board, 2. Points for controlling a neighborhood, and 3. Successful completion of your secret missions. The player with the highest score wins!
Overall, I love Dicetopia. It’s kind of a game of worker placement without the weight that is sometimes associated with that mechanic. As someone who has not played many worker placement games before, I think Dicetopia does a good job introducing players to the mechanic. You place your agent, take the die, perform the corresponding action, and that’s your turn. Easy peasy. And since your secret missions dictate your strategy, the game is really more about dice/set collection than it is about worker placement. Another thing I like about the game is that it is dictated by dice, which means you’ll never play the same game twice. All of the dice are rolled and randomly placed during setup, so your city board will always be different for each game. And depending on your secret missions, the die values could make completing your secret missions easier or harder! That means you have to strategize your use of neighborhood actions even more! There is so much more strategy involved in this game than meets the eye, and I love that.
The one thing I do not like about Dicetopia is that whenever you place an agent in a neighborhood, you must take the corresponding action. Even if you don’t want to, or if it would be against your best interest. That gets a little frustrating as the game goes on, because some actions (later in the game) could essentially undo your entire game, costing you points by altering your success on secret missions. I wish the neighborhood actions were optional, because then it wouldn’t feel like my entire game strategy had been thrown out the window in the last couple of turns.
Besides my one grievance with the neighborhood actions, I really thoroughly enjoy playing Dicetopia. It was definitely a great find on Kickstarter for me, and I hope you’ll decide to give it a shot too! Purple Phoenix Games gives it a 9 / 12.
https://purplephoenixgames.wordpress.com/2018/12/17/dicetopia-review/
Red Otter (340 KP) rated Targi in Tabletop Games
Jun 6, 2019

The game is played with a with an ever changing 5x5 grid of goods and tribe cards, with a outer ring of cards that can almost ways been selected. A robber goes around blocks off some of the outer rings of cards and serves as a timer for the game. The worker placement portion is interesting, 3 workers are placed on the outside ring, and the intersections they create between themselves are where you ace your next two.
Targi is a relatively simple game with depth. It requires outthinking your opponent as it is relatively easy to deny the other player what they want, but not necessarily get what you need at the same time. The balance comes from trying to acquire points while at the same time getting the resources to buy those cards in the first placrz especially with the heavy emphasis on points from set collections. A great game for couples

Frostpunk: The Board Game
Tabletop Game
In Frostpunk: The Board Game, up to four players will take on the role of leaders of a small colony...
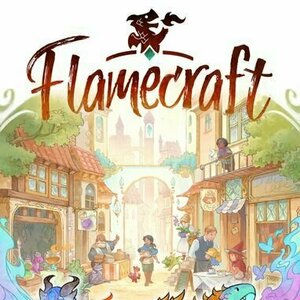
Flamecraft
Tabletop Game
Artisan dragons, the smaller and magically talented versions of their larger (and destructive)...

Snowdonia
9.0![]() Rate It
Rate It
Tabletop Game
The peaks of Snowdonia rise before you, encased in mist, their summits barely visible. The highest...
Boardgames WorkerPlacementGames

Micro Dojo
8.0![]() Rate It
Rate It
Tabletop Game
In Micro Dojo, you represent one of two Daimyos who have been tasked by the Shogun to bring...
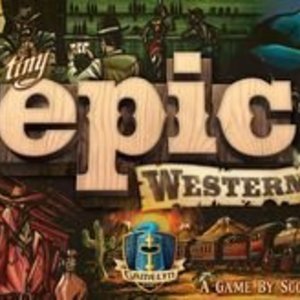
Purple Phoenix Games (2266 KP) rated Tiny Epic Western in Tabletop Games
Dec 30, 2021
Disclaimer: I do not intend to rehash the entire rulebook in this review, as there are just too many details, but will instead provide a more general overview of the rules and gameplay. -L
Tiny Epic Western is a game of worker placement and set collection in which players are trying to amass the most end-game victory points. Played over a series of rounds, players will be placing their Posse (Meeples), collecting Influence and taking actions, dueling opponents (if necessary), playing a bit of poker, and buying buildings in an effort to become the most powerful boss in this wild west town. To setup for a game, place the Location Mats as described in the rules, dealing a Building Card where appropriate. Each player receives a Boss card, 3 Posse tokens (Meeples), and one of each of the Influence trackers (Money, Law, and Force), placed on the 1 space of their card. Shuffle the decks of Building Cards and Poker Cards separately, choose a starting player (who receives the Dealer token), place the Wanted card/Gunslinger dice in the center of the play area, and the game is ready to begin! Pictured below is the starting setup for a 3-player game.
The game is played over 6 total rounds, each of which is broken into 4 phases: Shuffle and Deal, Posse Placement, Resolution, and Buy. To start a round, the Dealer shuffles the deck of Poker cards, and then deals 1 card face-up to the 6 empty spaces between the Location Mats. One Poker card is dealt face-down to the Rival Space (under the Town Hall Location Mat), and 2 Poker cards are dealt face-down to each player. Players look at both of their cards and pick 1 to keep, discarding the other. The round then moves to phase 2: Posse Placement. Starting with the Dealer, players will take turns placing Posse tokens onto the placement spots on any of the Location mats. All placement spots grant unique benefits (collecting different Influence or performing Building card actions) that are performed either immediately or during later phases of the round. What happens if an opponent took a placement spot that you wanted? Then it’s time for an old-fashioned duel! The dueling players each roll a Gunslinger die, modify it if they so choose, and determine a winner. Players continue taking turns placing Posse tokens until all available Posse tokens have been placed.
When all Posse tokens have been placed, the round moves to phase 3: Resolution. The first step of this phase is to reveal Poker cards – all players reveal their cards, and the card in the Rival Space is also revealed. Moving clockwise from the Town Hall, each Location will be resolved by ‘playing’ three-card poker. Each Location has 2 Poker cards directly adjacent to it (placed between the Locations in phase 1), and those 2 cards plus the one in your hand will form your Poker hand. Any players with Posse tokens on the Location will compare their Poker hands to determine a winner. If you win the hand, you collect the Winner’s Pot (extra benefits) and are able to collect any delayed benefits from placement spots in the Posse Placement phase. Losing the hand earns you nothing *womp womp*. If you are the only Posse on a Location (with no opponents) you will compare your hand to that of the Rival. The Rival’s hand uses the cards adjacent to the Town Hall, plus the revealed card in the Rival Space. If you have a better hand, you win the benefits on your Location. If the Rival wins, though, you do not collect these benefits. All Locations are resolved in this fashion before the last phase of the round, Buy, begins.
To start this phase, all players will compare their three-card Poker hands using the 2 Poker cards adjacent to the Town Hall. The player with the best hand will act first in this phase, followed by the next best hand, and so on. The first player may now choose to buy a Building card from any Location on which they have a Posse token. Pay the requisite amount of Influence to purchase a Building, and add it to the Porch Slot on your color-corresponding Location Mat. The power granted by this Building card is now available for use in future rounds. Once all players have had the option to purchase a Building, the player with the best hand will advance one of the Industry Tokens at Town Hall. The placements of Industry Tokens will affect end-game scoring, so keep that in mind as the game progresses. When all steps of the Buy phase are performed, the round now ends. Players collect all their Posse tokens back to their boss cards, all Poker cards are collected and re-shuffled, new Building cards are dealt to Locations from which they were purchased this round, and the Dealer token is passed to the next clockwise player. If a player did not buy a Building at all during the round, they have gained the Third Posse Benefit for the coming round – granting them an additional Posse token to place during phase 2. Otherwise, all players will only ever have 2 Posse tokens to place.
After a total of 6 complete rounds, the game ends and points are tallied. Victory Points are earned from Building cards bought throughout the game. Building cards have a specified VP amount, and also have a collection of Industry Icons on them. Using the final placement of the Industry Tokens on the board, players will earn points for Industry Icon sets they have collected. And finally, whomever holds the Wanted card (won the last duel) gains an additional 2 VP. Points are all counted, and the player with the highest score is the winner.
That all probably sounds pretty complicated. But I do have to say that verbally explaining/teaching the game (and being able to use components for examples) is waaaaay easier than doing so through a text review. So please do not let the seemingly complex gameplay turn you off from this game. Once you get a basic understanding of the phases of each round, the game moves along pretty seamlessly. Honestly, the biggest learning curve for me to conquer was playing three-card poker. As someone who has never played any form of poker before, this was probably what had me most hesitant about learning TEW. After having played it now, three-card poker really isn’t too complicated, and there are some nice player reference cards to help you figure it out.
Aside from the poker element, this game really comes down to worker placement and strategy. Each Location card only has a finite number of placement spots, and the resources required to buy Buildings are not exactly in abundance. This affects your strategy, as you must decide which resources to collect at what times, as well as deciding whether you need to duel someone for a coveted resource. Another element to your strategy? You may only buy Building cards from Locations on which you have a Posse token. Maybe none of those placement spots really appeal to you this round, but you reaaaaally want that specific Building card. Are you willing to ‘burn’ a Posse token for the chance to buy it? Or is there a different Location that offers a useful resources and a desirable Building card? Also, keep in mind how your poker hand will come into play. Since poker cards are dealt to each Location at the start of a round, you are able to see what your hand will be for each Location. Maybe you have a pretty strong hand at the Bank Location, but at the Courthouse the cards end up being a bust. Are you willing to risk a placement in hopes that you have the best hand of the bunch? Because remember – if you don’t have the best hand at a Location, you get no resources/rewards! There are so many elements to a successful strategy with this game, and it really keeps all players engaged at all times. Be warned though – the variety of strategic options could be difficult for some AP-prone players.
Let me touch on components for a minute. As with all Tiny Epic games, the production quality of TEW is pretty stellar. The cards are nice and sturdy, and the iconography is clear. The Posse tokens are cute Meeples with cowboy hats, and they are nice and chunky. The only thing I don’t really like about this game are the Gunslinger dice. In theory, they are super cool, but in actual execution, they leave much to be desired. The numbers aren’t really clearly define, so they’re a bit tricky to read. Aside from that, a pretty high quality game here.
So all in all, how does Tiny Epic Western stand up in the series? It is definitely one of the heavier games of the bunch, and there is so much more going on than initially meets the eye. It feels daunting for the first few plays, but once you get the phases under your belt, it really flows pretty well. I can’t say that it is my favorite Tiny Epic game, as I just personally feel like there are too many elements going on at the same time. You’re strategizing your worker placement, but also need to consider buying Buildings for VP and to collect sets of Industry Icons and for their specific abilities, as well as figuring out your poker hand for 5 different Locations, and dealing with duels. Some people might really be into that amount of strategic forethought, but it feels a bit cumbersome to me. That being said, Purple Phoenix Games gives this three-card poker game a 3/6. The gameplay is decent, just not really my kind of game.


Weather Machine
Tabletop Game
“Natural disasters will soon be a thing of the past!” proclaimed Professor Sêni Lativ, Project...
Purple Phoenix Games (2266 KP) rated The Artemis Project in Tabletop Games
Apr 6, 2021
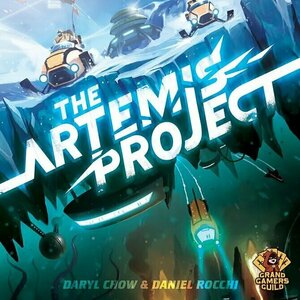
The Artemis Project is a game of dice/worker placement in which players are trying to build and sustain a prosperous colony on Jupiter’s moon Europa. Played over 6 rounds, players will take turns rolling and placing dice across the regions of the board to collect resources, construct buildings, recruit and train colonists, and partake in expeditions to explore this vast ice-land. To begin, follow the setup instructions in the rulebook for the appropriate player count. Each player receives a player board, dice, and markers in their chosen color. Populate the board for the first round, select a starting player, and the game is ready to begin!
Disclaimer: I do not intend to rehash the entire rulebook in this review, as there are just too many details. For a more in-depth look at The Artemis Project, pick up a copy from your FLGS or directly from the publisher! -L
To start each round, all players will simultaneously roll all 5 of their dice. Once players are happy with their results, the round is ready to properly begin. Each round is broken into three phases: Placement, Resolution, and Upkeep. To begin the Placement phase, starting with the first player, players will take turns assigning one die at a time to the 7 regions of the board. These regions are: Basecamp, Vents, Quarry, Gantry, Doorstep, Academy, and Outfitters. (I will explain each region in more detail in the next section!) The value of the dice placed in any region is important, because it will dictate what you are allowed to do, or when you are allowed to resolve the action for that region – so choose your placements wisely.
Once every player has placed all 5 of their dice, the Resolution phase begins. During the Resolution phase, each of the regions of the board will be resolved in order, allowing players to perform their region-specific actions. Resolution starts with Basecamp. Placing dice at Basecamp allows players to partake in Expeditions in an effort to earn Expedition Badges (which translate to end-game VP), as well as extra rewards. Each Expedition has a difficulty level which must be equaled or surpassed by the total of all dice placed on that card. If the difficulty is surpassed, the Expedition is a success and rewards are doled out accordingly, but if the Expedition fails, no rewards are earned by anyone.
The next 2 regions, Vents and Quarry, allow players to collect Energy and Minerals, respectively, and are resolved in the same way. Players will collect a number of resources equal to their played die value. Pretty straight-forward! Moving on to the Gantry region, the value of dice placed on any building tiles are considered bids for buying/constructing that building. You can bid against opponents for building tiles, but each bid must increase the previous amount. When resolving the Gantry, the highest value die on a tile is the winner, and that player must pay their die-amount in Minerals to collect that tile. Buildings are added to your colony, and allow you to perform special actions once they are fully-staffed (all colonist slots on the tile are filled).
Next is the Doorstep – depending on the value of dice you placed there, you will be able to recruit 1-3 new colonists. Recruiting a colonist costs you 2 Energy per new addition, and any new colonists you recruit can be placed immediately into any of your buildings (if space is available), or into your Shelter where they will wait to be used. The Academy region allows you to exchange a colonist of your choice for one of a different type/occupation, again, depending on the value of the die used. And finally, the Outfitters region does not resolved during this phase, because it’s action is performed immediately upon dice placement. Any dice placed to the Outfitters gives Tool Kits (used to manipulate die values at the start of each round) to the player, based upon the die value.
The remaining element of the Resolution phase is the Even card. At the start of each round, an Event card is drawn, and will pertain to a certain region of the board. During the Resolution phase, when that region is reached, the Event card will be resolved – either penalizing players or benefitting them in some way. I have purposefully left out a few elements of the Resolution phase for you to discover on your own!
Once all regions have been resolved, the round moves to the Upkeep phase. During this phase, all players can choose to move 1 colonist to a building tile, or swap any 2 colonists between buildings. This is not required, but can only be performed once during this phase. Next, if any players have fully-staffed buildings (all colonist slots are filled), they may activate the listed ability. And finally, for any colonists left in your shelter and not in a building, you must pay 1 Energy for each to keep them warm! The game board is now refreshed for the next round, a new starting player is selected, and the new round is ready to begin. After the 6th and final round, VPs are tallied – earned through number of building tiles, Expedition Badges, sets of resources, and sets of colonists – and the player with the most VP is the winner!
I know that seems like a lot, but I promise that once you start the first round, everything is pretty intuitive and the game flows well. The turn sequence and phases are logical and easy to understand. The game board itself has lots of helpful icons that work as reminders throughout gameplay, and the rulebook has a nice and concise round overview on the last page as well, which is easy to refer back to at a moment’s notice. I’ll go ahead and touch on components here, since I kind of already started to do so. The components in this game are great! The game board and cards are all sturdy and have colorful and immersive artwork. The dual-layered player boards are high quality, the colonist meeples are cute and effective, the building tiles and cardboard chits are strong and can definitely hold up to many plays, and the dice are easy to roll and read. Definitely an A+ on components from me.
I have to admit that The Artemis Project surprised me. At its core, it is a worker placement game, and that in and of itself lends itself to a certain gameplay. You’re trying to complete your own agenda, being the first to snag those important placements that you need to accomplish those goals, while also blocking opponents from doing the same. The thing that makes The Artemis Project unique is that the ‘workers’ in this game are dice. And their value is what dictates the resolution of each region. Just because you place a die in a region first, does not necessarily mean that you will get to resolve first – depending on how your opponents play, they could block you entirely! The use of dice adds an extra layer of strategy to the gameplay that really elevates it beyond a simple worker placement mechanic. Another great thing about this game is that there is no one way to win – there are several strategies that you could play by in an effort to earn VPs. Maybe you are trying to complete as many Expeditions as possible, or want to construct as many buildings as possible. Either strategy can work, and all strategies can easily be adapted and altered during gameplay.
I am so happy that I came across this game on Kickstarter. The game is strategic, engaging, and just fun to play. I’m not necessarily a huge fan of worker placement games, but the approach to the mechanic taken by The Artemis Project really puts a unique twist on it that adds to the gameplay. This is one KickStarter that was definitely worth the investment. Check it out if you haven’t heard of it, or if you’re looking to elevate your worker placement games. Purple Phoenix Games gives it an enterprising 10 / 12.


